
As we already know Spring cloud config server will picked up the configuration from a git repoositroy
we will able to connect our Litim service to the spring-cloud-config-server and we have already prepare the service for configuration so for now we need to install the Git for this
Download the git from here https://git-scm.com/
After installing got to git Bash
got to Specific Dirctory like d
Run the Following commands
will go inside the D drivecd d:
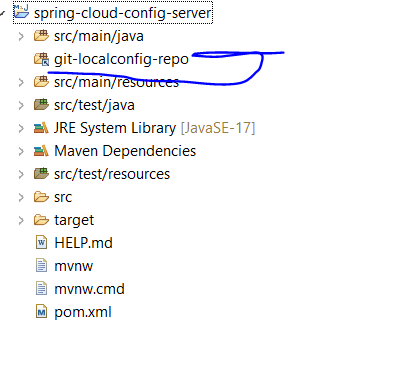
will create new folder with git-localconfig-repo name
mkdir git-localconfig-repo
go inside to the given folder
cd git-localconfig-repo/
This would create new git repository so it says initialized empty Git Repository
git init
Initialized empty Git repository in D:/git-localconfig-repo/.git/
Now got to the Spring Cloud Config Server spring project and add a link to the that specific folder:
Go to the project right click Build path
Thank click on link source and brows the Git folder
New folder will be aprears in the Project folders
Now create properties file inside the given folder
and add the given below properties
Now you can push this changes your repo using commands
git commit -m "First Commit"
git push
now add the location of the git-localconfig-repo path in your spring-cloud-config-server properties file
Right Click on git-localconfig-repo folder ==> and Properties and get the path from there
spring.cloud.config.server.git.uri=/spring-cloud-config-server/git-localconfig-repo
add Given above properties in your
spring-cloud-config-server properties file
Now add file:// in front of your path
spring.cloud.config.server.git.uri=file:///spring-cloud-config-server/git-localconfig-repo
so given aboce url did not work so finally we can copy the path from the local directly
spring.cloud.config.server.git.uri=D:\\\\git-localconfig-repo
OR better like
spring.cloud.config.server.git.uri=file:////D:/git-localconfig-repo
After running the application in given port
http://localhost:8888/limit-service/default
here limit-service is the file of properties file which will picked up the service with default
Getting writelabel Error Page
Now we need to enable spring cloud config server by using Annotation in you main class is
@EnableConfigServer
@EnableConfigServer
@SpringBootApplication
public class SpringCloudConfigServerApplication {
public static void main(String[] args) {
SpringApplication.run(SpringCloudConfigServerApplication.class, args);
}
}
Here is we are able to retrieve the property from the limit-service.properties file and also path
"name": "D:\\\\git-localconfig-repo/limit-service.properties", from where we are getting this values
So here we have learn how to create connection between Spring cloud config server and GIT repository
One of the Major important think is about the spring cloud config server is it store the configuration for multiple services.
Example, limit service, currency exchange service and curreny calculation service
and also it can store configurations for each of these services for diffrent environment
For Example, the limit service
Like we have for environments (DEV, QA, STAGE, and Production)
We can store all the configuration releted to all those 4 environment using this spring cloud config server
STEP 8
We might have multiple environment for perticular service like Limit service deployed into
Dev Prod QA and Stage how we can configured in GIT deposit.
Create diffrent Environment file by using hyphen - and env name
limit-service-dev.properties
limit-service-qa.properties
Dev has
limit-service.minimum=1
limit-service.maximum=111
QA has
Now while accessing given links http://localhost:8888/limit-service/dev it will give priority to Dev property first than default one like 8 and 888
http://localhost:8888/limit-service/qa this will the priority to qa properties and if the one property is not there than will overide by default property which is 888


Comments
Post a Comment